How to Manage Features in .NET and C# with Azure App Configuration: Centralized Feature Flags and Settings
Introduction
In my previous article, “How to Turn On Features in .NET and C# Without Redeploying: Exploring Feature Flags and A/B Testing”, I introduced the concept of feature flags and explained their value in modern software development. We explored how they enable dynamic feature control, safer rollouts, and experimentation like A/B testing, all while minimizing downtime.
Building on that foundation, this article dives deeper into an advanced tool for feature management: Azure App Configuration. Designed to centralize application settings and feature flags, Azure App Configuration offers a scalable and secure solution for managing complex configurations in distributed systems.
Whether you’re working with microservices, serverless apps, or a traditional .NET application, Azure App Configuration simplifies the way you manage feature flags and settings. We’ll explore how it works, why it’s useful, and walk through a practical example to help you get started.
By the end of this article, you’ll have a solid understanding of how to leverage Azure App Configuration to streamline feature management in your .NET applications. Let’s get started! 🚀
What is Azure App Configuration?
Azure App Configuration is a fully managed service that provides a centralized approach to managing application settings and feature flags. In modern software architectures, especially cloud-based ones, applications often consist of distributed components running across multiple virtual machines, containers, or regions. Keeping configuration settings synchronized across these components can quickly become a challenge, leading to errors during deployment and complicating debugging.
With Azure App Configuration, all your application’s settings and feature flags are stored in a single, secure location, accessible in real time. This allows for seamless updates to configurations without the need for application redeployment, significantly reducing downtime and improving flexibility.
Why Use Azure App Configuration?
Managing application configurations becomes increasingly complex in distributed environments. Modern development techniques like microservices, serverless applications, and continuous deployment pipelines often require configurations to change dynamically based on context, user location, or deployment stage.
Here’s why Azure App Configuration is a game-changer:
- Centralized Configuration Management
Instead of scattering configuration settings across services, environments, or infrastructure, App Configuration consolidates them into one place. This centralization reduces the risk of mismatched configurations and simplifies management. - Dynamic Updates Without Redeployment
App Configuration enables dynamic changes to settings and feature flags without restarting or redeploying the application. For example, you can enable a new feature or modify a behavior instantly for a subset of users. - Supports Best Practices
Techniques like those outlined in the Twelve-Factor App methodology encourage separating configurations from code. App Configuration aligns perfectly with these practices by externalizing settings and making them accessible via runtime APIs.
Scenarios for Azure App Configuration
Azure App Configuration proves invaluable in several development scenarios:
- Microservices Architectures
In environments like Azure Kubernetes Service (AKS) or Azure Service Fabric, where microservices operate independently, App Configuration ensures consistency across service boundaries. - Serverless Applications
For stateless, event-driven apps built with Azure Functions, App Configuration simplifies the management of dynamic settings like scaling thresholds or runtime toggles. - A/B Testing and Real-Time Feature Rollouts
Use feature flags to control which user segments see specific features, enabling experimentation and gradual rollouts. For example, you could enable a new payment gateway only for beta testers while maintaining the current one for the general audience. - Continuous Deployment Pipelines
Integrating App Configuration into your CI/CD workflows allows environment-specific settings (e.g., staging vs. production) to be applied dynamically, reducing manual intervention and errors.
Key Benefits of Azure App Configuration
- Ease of Setup
App Configuration is fully managed and can be configured within minutes using the Azure portal or CLI. - Advanced Features
- Tagging with Labels: Manage multiple versions of a setting for different environments or conditions.
- Point-in-Time Replay: Revert to a previous configuration state if needed.
- Custom Comparisons: Compare configuration sets to identify discrepancies.
- Tagging with Labels: Manage multiple versions of a setting for different environments or conditions.
- Enhanced Security
- Leverage Azure-managed identities for secure access.
- Encrypt sensitive information both in transit and at rest.
- Seamless Integration
Azure App Configuration integrates natively with Azure Key Vault for managing secrets, and with frameworks like ASP.NET Core, enabling smooth adoption in .NET applications.
Setting Up Azure App Configuration for .NET: Prerequisites
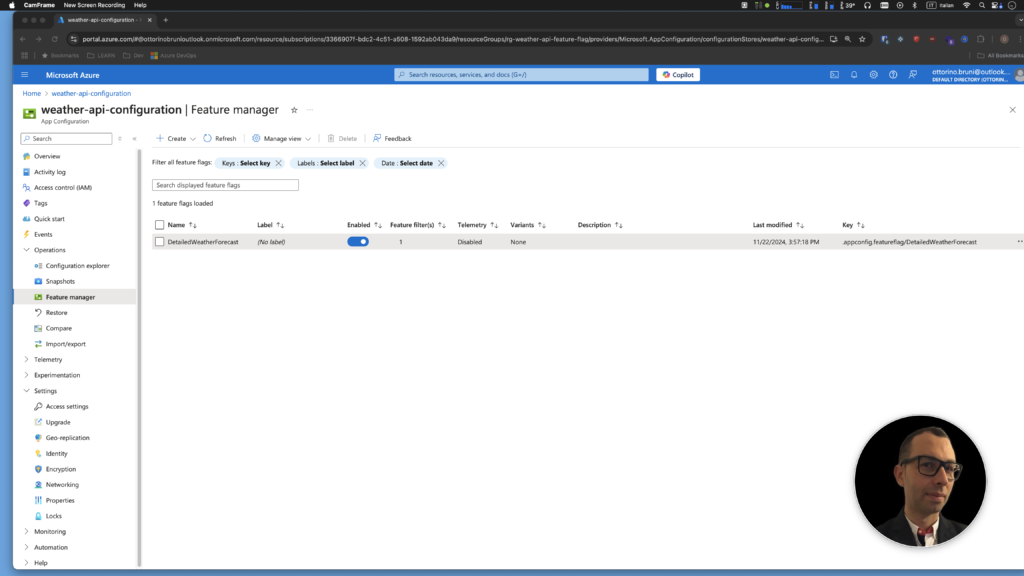
Before diving into the code, we need to set up Azure App Configuration in the Azure portal. This setup will include creating an App Configuration store and defining the feature flags and filters we’ll use later in our .NET application.
Prerequisites
To follow along, ensure you have the following ready:
1. Azure Subscription
You’ll need an active Azure subscription to create the App Configuration store. If you don’t have one, you can sign up for a free account.
2. Azure Portal Access
Familiarity with navigating the Azure Portal will be helpful for creating and managing the App Configuration store.
3. Development Environment
- Azure CLI (optional): If you prefer command-line tools for Azure operations, install the Azure CLI.
Setting Up the App Configuration Store
- Log in to Azure Portal
Go to the Azure Portal and search for “App Configuration” in the search bar. - Create an App Configuration Store
- Click Create.
- Select a subscription and resource group for your store.
- Provide a unique name for your App Configuration instance.
- Choose a region close to your application’s deployment region.
- Click Review + Create, then Create once validation is complete.
- Save the connection string for the example.
- Add Feature Flags
Once your store is created:
- Navigate to the Feature Manager section in the App Configuration blade.
- Add new feature flags as needed (e.g.,
DetailedWeatherReport). - Optionally, assign filters like custom feature filter, percentage rollout or time-based activation to control how the feature flag behaves dynamically.
Why Set Up Feature Filters?
Azure App Configuration’s feature filters provide advanced control mechanisms for feature flags. These include:
- Activating a feature flag for a specific time period.
- Rolling out features gradually to a percentage of users for A/B testing.
- Enabling features for specific targeted audiences, such as beta testers or users in specific geographies.
- Create a custom feature filter.
We’ll demonstrate how to use these filters in the upcoming coding section.
With the App Configuration store set up and feature flags defined, we’re ready to integrate it into our .NET application. Up next, we’ll build a sample weather API and use Azure App Configuration to manage its feature flags dynamically.
Implementing Feature Flags with Azure App Configuration in .NET and C#: A Practical Example
Disclaimer: This example is intended for educational purposes only. While it demonstrates key concepts, there are more efficient ways to write and optimize this code in real-world applications. Consider this a starting point for learning, and always aim to follow best practices and refine your implementation.
Prerequisites
Before starting, make sure you have the following installed:
- Visual Studio Code (VSCode): Install Visual Studio Code for a lightweight code editor.
- C# Extension for VSCode: Install the C# extension for VSCode to enable C# support.
- .NET SDK: Download and install the .NET SDK if you haven’t already.
Step 1: Setting Up the Project
Clone the repository:
git clone https://github.com/ottorinobruni/WeatherApiWithFeatureFlags.git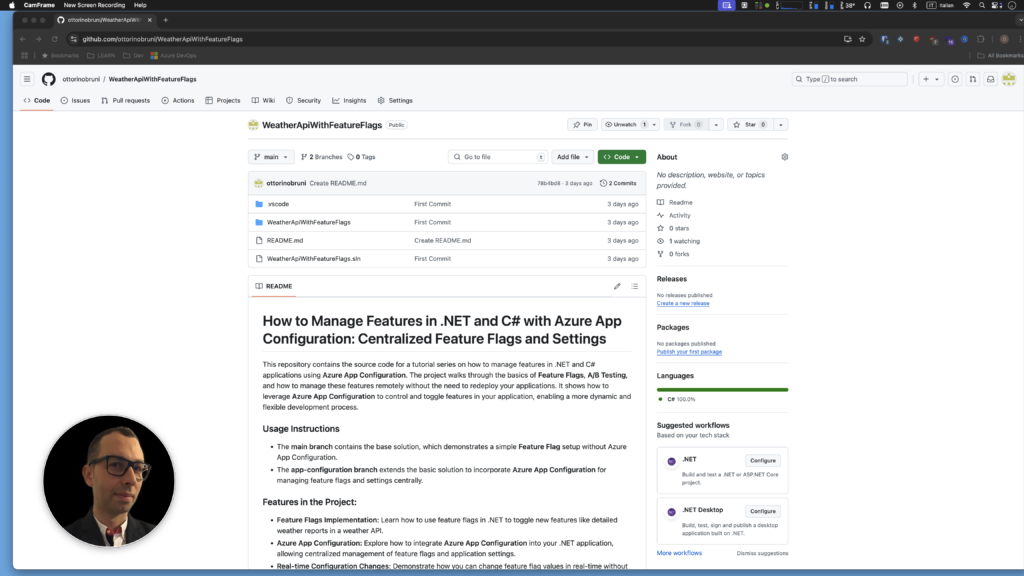
Add the Microsoft.Azure.AppConfiguration.AspNetCore NuGet package:
dotnet add package Microsoft.Azure.AppConfiguration.AspNetCoreStep 2: Configuring Connection String
Remove the hardcoded FeatureManagement section from appsettings.json. Instead, connect your app to Azure App Configuration:
{
  "Logging": {
    "LogLevel": {
      "Default": "Information",
      "Microsoft.AspNetCore": "Warning"
    }
  },
  "AllowedHosts": "*",
  "ConnectionStrings": {
    "AppConfig": "YOUR_CONNECTION_STRING"
  }
}
Step 3: Configure Azure App Configuration Integration
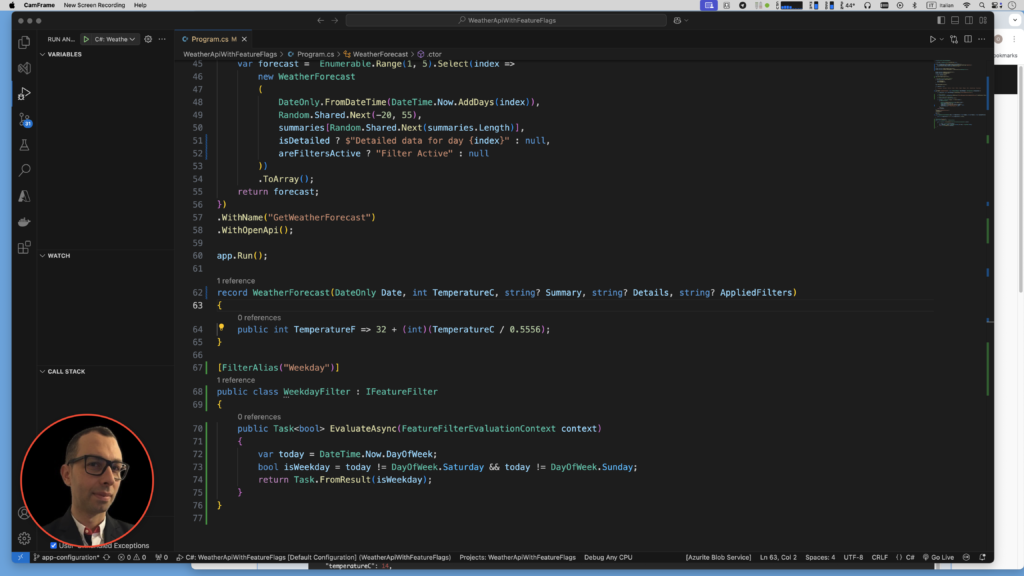
Updated Code in Program.cs, add Azure App Configuration and enable feature filters.
using Microsoft.FeatureManagement;

var builder = WebApplication.CreateBuilder(args);

builder.Configuration.AddAzureAppConfiguration(options => {
    var connectionString = builder.Configuration.GetConnectionString("AppConfig");
    options.Connect(connectionString).UseFeatureFlags();
});

builder.Services.AddAzureAppConfiguration();
builder.Services.AddFeatureManagement();

builder.Services.AddEndpointsApiExplorer();
builder.Services.AddSwaggerGen();

var app = builder.Build();

app.UseAzureAppConfiguration();

// Configure the HTTP request pipeline.
if (app.Environment.IsDevelopment())
{
    app.UseSwagger();
    app.UseSwaggerUI();
}

app.UseHttpsRedirection();

var summaries = new[]
{
    "Freezing", "Bracing", "Chilly", "Cool", "Mild", "Warm", "Balmy", "Hot", "Sweltering", "Scorching"
};

app.MapGet("/weatherforecast", async (IFeatureManager featureManager, IConfiguration configuration) =>
{
    var isDetailed = await featureManager.IsEnabledAsync("DetailedWeatherForecast");

    // Get All Filters
    var featureFilters = configuration.GetSection("FeatureManagement:DetailedWeatherForecast").GetChildren().ToList();

    // Check if any filters are active
    var areFiltersActive = featureFilters.Any();

    var forecast =  Enumerable.Range(1, 5).Select(index =>
        new WeatherForecast
        (
            DateOnly.FromDateTime(DateTime.Now.AddDays(index)),
            Random.Shared.Next(-20, 55),
            summaries[Random.Shared.Next(summaries.Length)],
            isDetailed ? $"Detailed data for day {index}" : null,
            areFiltersActive ? "Filter Active" : null
        ))
        .ToArray();
    return forecast;
})
.WithName("GetWeatherForecast")
.WithOpenApi();

app.Run();

record WeatherForecast(DateOnly Date, int TemperatureC, string? Summary, string? Details, string? AppliedFilters)
{
    public int TemperatureF => 32 + (int)(TemperatureC / 0.5556);
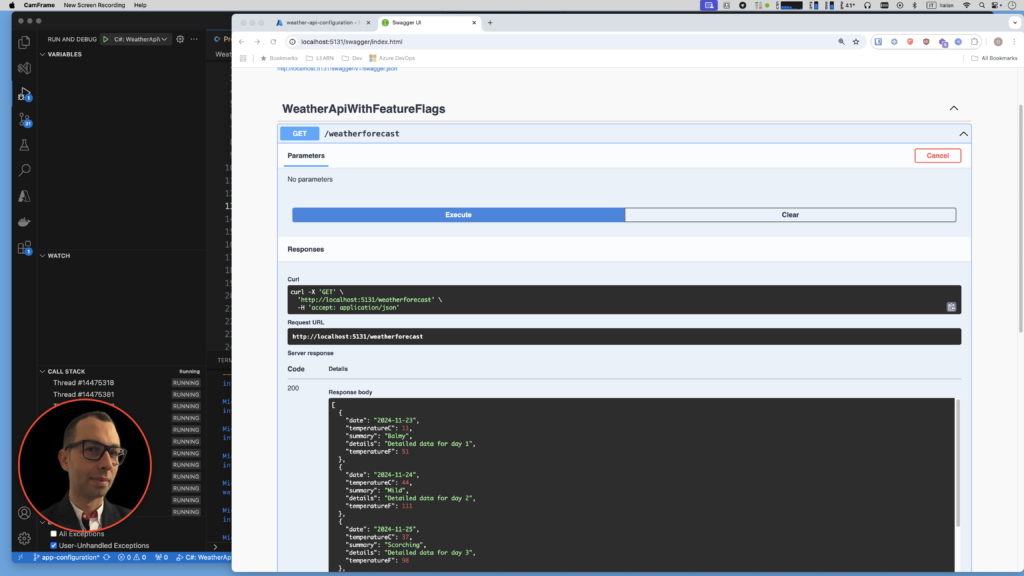
}
Step 4: Define Feature Flags and a Custom Filter in Azure App Configuration
Navigate to your Azure App Configuration resource in the Azure Portal:
- Create the Feature Flag:
- Go to Feature Manager.
- Click + Add to create a new feature flag named
DetailedWeatherForecast. - Set the initial state to Off.
- Add Filters to the Flag:
- Click on the
DetailedWeatherForecastflag to edit it. - Under Filters, add a filter such as:
- Create Custom Filter with a Custom filter name: Weekday and press Apply to save it.
- Click on the
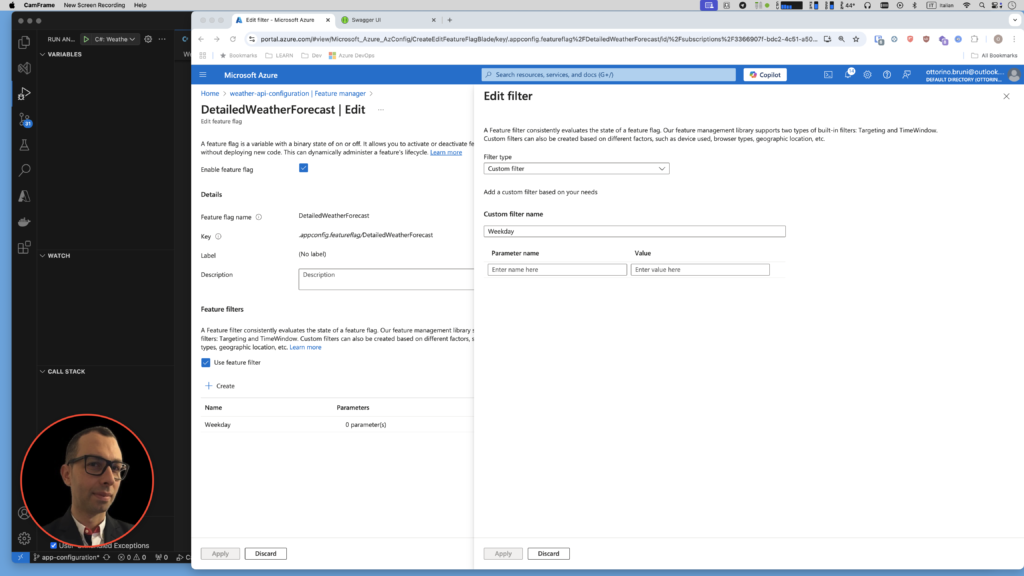
Step 4: Implement a custom feature filter
Add a WeekdayFilter class file with the following code.
[FilterAlias("Weekday")]
public class WeekdayFilter : IFeatureFilter
{
    public Task<bool> EvaluateAsync(FeatureFilterEvaluationContext context)
    {
        var today = DateTime.Now.DayOfWeek;
        bool isWeekday = today != DayOfWeek.Saturday && today != DayOfWeek.Sunday;
        return Task.FromResult(isWeekday);
    }
}
Open the Program.cs file and register the WeekdayFilter by calling the AddFeatureFilter method.
builder.Services.AddFeatureManagement().AddFeatureFilter<WeekdayFilter>();This is the full Program.cs code:
using Microsoft.FeatureManagement;

var builder = WebApplication.CreateBuilder(args);

builder.Configuration.AddAzureAppConfiguration(options => {
    var connectionString = builder.Configuration.GetConnectionString("AppConfig");
    options.Connect(connectionString).UseFeatureFlags();
});

builder.Services.AddAzureAppConfiguration();
builder.Services.AddFeatureManagement().AddFeatureFilter<WeekdayFilter>();


builder.Services.AddEndpointsApiExplorer();
builder.Services.AddSwaggerGen();

var app = builder.Build();

app.UseAzureAppConfiguration();

// Configure the HTTP request pipeline.
if (app.Environment.IsDevelopment())
{
    app.UseSwagger();
    app.UseSwaggerUI();
}

app.UseHttpsRedirection();

var summaries = new[]
{
    "Freezing", "Bracing", "Chilly", "Cool", "Mild", "Warm", "Balmy", "Hot", "Sweltering", "Scorching"
};

app.MapGet("/weatherforecast", async (IFeatureManager featureManager, IConfiguration configuration) =>
{
    var isDetailed = await featureManager.IsEnabledAsync("DetailedWeatherForecast");

    // Get All Filters
    var featureFilters = configuration.GetSection("FeatureManagement:DetailedWeatherForecast").GetChildren().ToList();

    // Check for active filters
    var areFiltersActive = featureFilters.Any();

    var forecast =  Enumerable.Range(1, 5).Select(index =>
        new WeatherForecast
        (
            DateOnly.FromDateTime(DateTime.Now.AddDays(index)),
            Random.Shared.Next(-20, 55),
            summaries[Random.Shared.Next(summaries.Length)],
            isDetailed ? $"Detailed data for day {index}" : null,
            areFiltersActive ? "Filter Active" : null
        ))
        .ToArray();
    return forecast;
})
.WithName("GetWeatherForecast")
.WithOpenApi();

app.Run();

record WeatherForecast(DateOnly Date, int TemperatureC, string? Summary, string? Details, string? AppliedFilters)
{
    public int TemperatureF => 32 + (int)(TemperatureC / 0.5556);
}

[FilterAlias("Weekday")]
public class WeekdayFilter : IFeatureFilter
{
    public Task<bool> EvaluateAsync(FeatureFilterEvaluationContext context)
    {
        var today = DateTime.Now.DayOfWeek;
        bool isWeekday = today != DayOfWeek.Saturday && today != DayOfWeek.Sunday;
        return Task.FromResult(isWeekday);
    }
}
Run the application by activating or deactivating the filter.
dotnet run 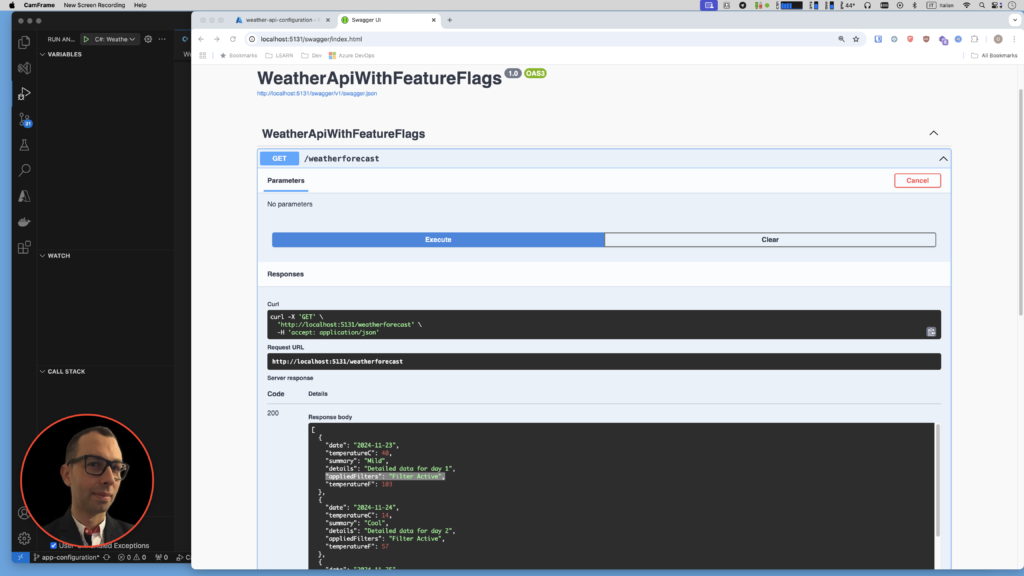
Conclusion
Conclusion
Using Azure App Configuration and custom filters is a great way to build professional, scalable, and flexible applications. The Feature Manager in the Azure portal provides an easy-to-use interface for creating and managing feature flags and variant feature flags, allowing developers to control their applications with more precision.
Here are the main advantages of using Azure App Configuration:
- Centralized Management: Keep all your application settings in one place to ensure consistency across different environments and deployments.
- Dynamic Features: Enable or disable features without needing to redeploy your application, making updates faster and more efficient.
- Custom Filters: Use custom filters like percentage rollouts or user-based targeting to control who gets access to new features.
- Variants for Flexibility: Create variant feature flags to offer different experiences for specific users, regions, or devices.
- Security: Azure provides strong security features like encryption for your data and Azure-managed identities for safe authentication.
Azure App Configuration is perfect for professional use cases, including A/B testing, gradual rollouts, and fine-tuned control over application behavior. It makes it easy to test new features, improve user experiences, and adapt to changes quickly, all while maintaining high performance and security.
If you are building modern applications like microservices, serverless apps, or enterprise solutions, Azure App Configuration will help you manage your features and settings efficiently. Start using it today to improve your development process and deliver better results! 🚀
If you think your friends or network would find this article useful, please consider sharing it with them. Your support is greatly appreciated.
Thanks for reading!
🚀 Discover CodeSwissKnife, your all-in-one, offline toolkit for developers!
Click to explore CodeSwissKnife 👉