ASP.NET Core Health Checks and Monitoring: Building Resilient Cloud Applications
Introduction to Resilience
In today’s world, developing an application with a cloud-first approach has become the standard. This approach ensures that applications are scalable, flexible, and can handle the dynamic demands of modern usage. One of the key aspects often discussed in this context is resilience. But what exactly is resilience?
Resilience in software development refers to an application’s ability to recover quickly from failures and continue operating without significant downtime.
ASP.NET Core offers Health Checks libraries that allow developers to monitor the health of their app’s infrastructure components. These health checks can be exposed as HTTP endpoints, which can then be used by container orchestrators, load balancers, or external monitoring services to assess the application’s status in real time.
In this article, we will explore how to implement health checks in ASP.NET Core, the benefits of health monitoring, and how these practices contribute to building resilient cloud applications. Whether you are an experienced developer or just starting out, understanding these concepts will help you create applications that can thrive in the cloud.

Understanding ASP.NET Core Health Checks
Health checks in ASP.NET Core are implemented as HTTP endpoints that serve crucial roles in real-time monitoring:
- Orchestrator and Load Balancer Integration: These endpoints allow container orchestrators and load balancers to assess an application’s health. For instance, if a health check fails, a container orchestrator might halt a rolling deployment or initiate container restarts. Similarly, a load balancer can redirect traffic away from unhealthy instances to maintain service availability.
- Resource Utilization Monitoring: Health checks extend beyond application status to monitor system resources like memory and disk usage. This monitoring ensures that the application operates within healthy resource limits, optimizing performance and reliability.
- Dependency Verification: Applications often rely on external services such as databases or APIs. Health checks verify the availability and proper functioning of these dependencies, ensuring seamless integration and reliable operation of the entire application ecosystem.
Health checks offers three distinct health check statuses:
- Healthy: Indicates that the application is functioning normally and in a stable state.
- Unhealthy: Signals that the application is currently offline or has encountered an unhandled exception during the health check execution.
- Degraded: Specifies that the application is operational but is not responding within the expected timeframe, suggesting potential performance issues.
Types of Health Checks
When developing applications, ensuring their reliability often involves monitoring various dependencies and services they rely on. ASP.NET Core offers different types of health checks to validate and ensure the smooth operation of these components:
- Basic Health Probes: These are straightforward checks configured as URL endpoints that return a simple health response. They provide a quick assessment of whether the application is functioning correctly.
- System Health Checks: These checks provide insights into the underlying host system’s health, including metrics like disk storage and memory usage. They help in monitoring and managing resource utilization.
- Database Probes: Specifically designed for database dependencies, these checks verify the availability and connectivity of database providers such as SQL Server, PostgreSQL, and MongoDB.
- Custom Health Checks: These checks are versatile and can be tailored to validate any aspect of your application’s ecosystem. Examples include verifying the status of third-party services or APIs, ensuring logging systems are operational, or checking resource capacities.
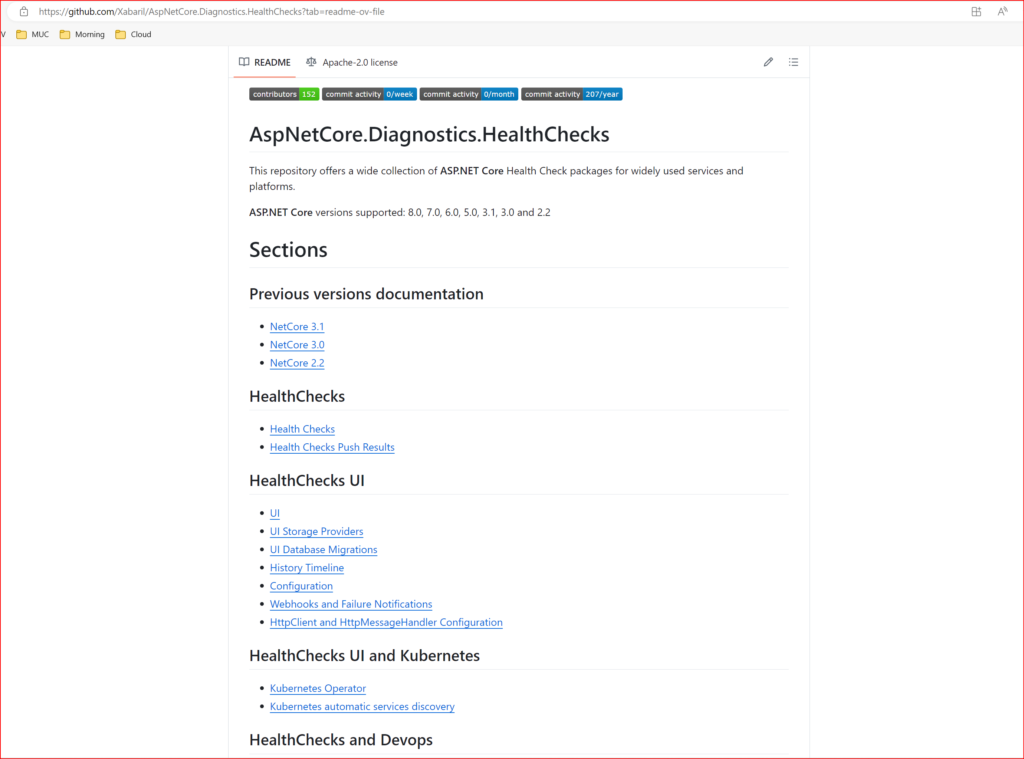
ASP.NET Core Health Checks supports integration with various essential services and platforms:
- SQL Server
- PostgreSQL
- MongoDB
- Azure Blob Storage
- Azure Queue Storage
- Azure Service Bus
- Azure Key Vault
- Azure CosmosDB
- AWS S3
- AWS DynamoDB
- AWS RDS (Relational Database Service)
- Elasticsearch
- Redis
- RabbitMQ
- SignalR
- Hangfire
- … and many more
These integrations enable developers to implement comprehensive health checks tailored to specific service dependencies, ensuring robust monitoring and resilience in ASP.NET Core applications.

Implementing HealthChecks Example
In this example, I’ll show you how to set up basic HealthChecks in an ASP.NET Core Web API using Visual Studio Code (VSCode). We will install the necessary packages, configure the HealthChecks, and verify the health status of the application.
- Create a New Web API Project
- Open VSCode and create a new ASP.NET Core Web API project by running the following commands in the terminal:
dotnet new webapi -n WebHealthChecksApp
cd WebHealthChecksApp
- Open VSCode and create a new ASP.NET Core Web API project by running the following commands in the terminal:
- Install HealthChecks Package
- Install the
Microsoft.Extensions.Diagnostics.HealthCheckspackage by running:dotnet add package Microsoft.Extensions.Diagnostics.HealthChecks
- Install the
- Configure HealthChecks in
Program.cs- Open the
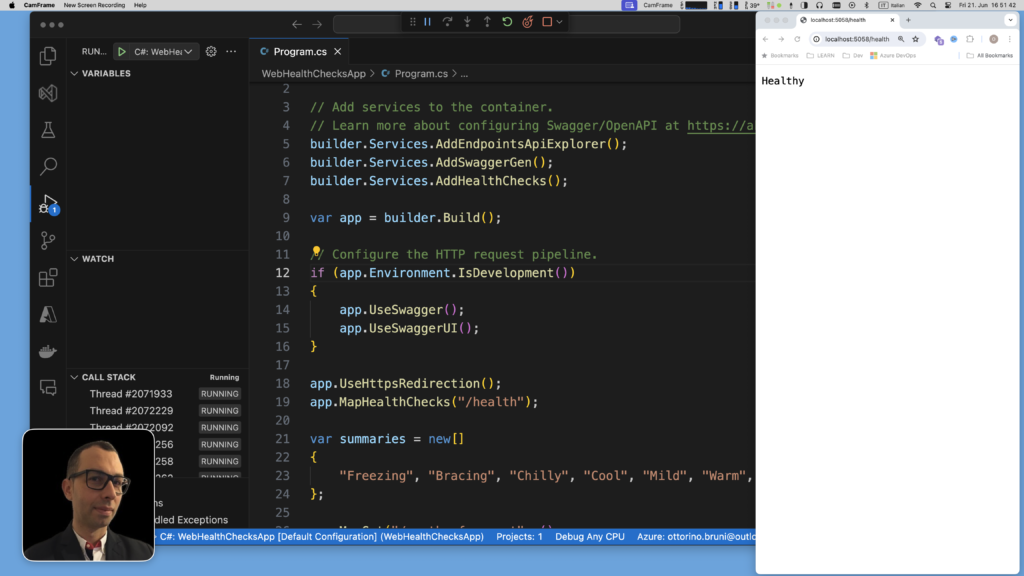
Program.csfile and add the HealthChecks services and endpoint:var builder = WebApplication.CreateBuilder(args);builder.Services.AddHealthChecks();var app = builder.Build();app.MapHealthChecks("/health");app.Run();
- Open the
- Run the Application
- Start the application by running:
dotnet run - Once the application is running, open your browser and navigate to
http://localhost:YOUR-PORT/health.
- Start the application by running:
- Verify Health Status
- When you visit
http://localhost:YOUR-PORT/health, you will see the health status of your application. If everything is configured correctly, you should see a simple response indicating that the application is healthy.
- When you visit

Great! Now let’s assume that for our API to function correctly, it needs a specific site or third-party APIs to always be active, in the example we are going to check “https://github.com/”.
- Install the Necessary Package
- We need the
AspNetCore.HealthChecks.Urispackage to check the status of external URLs:dotnet add package AspNetCore.HealthChecks.Uris
- We need the
- Update
Program.csto Add the URL Health Check- Open
Program.csand modify the HealthChecks configuration to include a check for the GitHub URL:using Microsoft.Extensions.Diagnostics.HealthChecks;builder.Services.AddHealthChecks().AddUrlGroup(new Uri("https://github.com/"), name: "GitHub", failureStatus: HealthStatus.Degraded);
- Open
- Run the Application
- Start the application by running:
dotnet run
- Start the application by running:
You should see the health status of your application, including the check for the GitHub URL.

Implementing a Custom Health Check
Health checks are created by implementing the IHealthCheck interface. The CheckHealthAsync method returns a HealthCheckResult that indicates the health status as Healthy, Degraded, or Unhealthy. The result is written as a plaintext response with a configurable status code. Configuration options are described in the Health check options section. HealthCheckResult can also return optional key-value pairs.
Here’s a basic example demonstrating the structure of a health check:
public class SampleHealthCheck : IHealthCheck
{
  public Task<HealthCheckResult> CheckHealthAsync(HealthCheckContext context, CancellationToken cancellationToken = default)
  {
    var isHealthy = true; // Your health check logic here

    if (isHealthy)
    {
      return Task.FromResult(HealthCheckResult.Healthy("A healthy result."));
    }

    return Task.FromResult(new HealthCheckResult(context.Registration.FailureStatus, "An unhealthy result."));
  }
}
In this example, the health check logic is placed in the CheckHealthAsync method. The variable isHealthy is set to true to indicate that the health check has passed. If the value of isHealthy is set to false, the HealthCheckRegistration.FailureStatus status is returned.
If CheckHealthAsync throws an exception during the check, a new HealthReportEntry is returned with its HealthReportEntry.Status set to the FailureStatus. This status is defined by AddCheck (see the Register health check services section) and includes the inner exception that caused the check failure. The description is set to the exception’s message.
To register a health check service, call AddCheck in Program.cs:
// Register health check services
builder.Services.AddHealthChecks().AddCheck<SampleHealthCheck>("Sample");
Implementing AspNetCore.HealthChecks.UI for Visualizing Health Checks
Implementing AspNetCore.HealthChecks.UI offers a user-friendly interface to visually assess the health status of various components within your ASP.NET Core application. This section guides you through the setup and utilization of AspNetCore.HealthChecks.UI, highlighting its dependencies and additional recommended package.
Dependencies
Before proceeding, ensure your project includes the following essential packages:
- AspNetCore.HealthChecks.UI: Provides essential UI components and endpoints for health check visualization.
- AspNetCore.HealthChecks.UI.Client: Enables seamless integration with the UI to display health check results.
- AspNetCore.HealthChecks.UI.InMemory.Storage: Optional package that provides in-memory storage for health check results, suitable for development and testing environments.
- Install Required Packages: Ensure the necessary packages are added to your project:
dotnet add package AspNetCore.HealthChecks.UIdotnet add package AspNetCore.HealthChecks.UI.Clientdotnet add package AspNetCore.HealthChecks.UI.InMemory.Storage - Configure Health Checks: Set up your health checks as usual in your application.
- Configure Health Checks UI: In your
Startup.cs, configure the endpoints for health checks and health checks UI:
builder.Services.AddHealthChecks()
  .AddUrlGroup(new Uri("https://github.com/"), name: "GitHub", failureStatus: HealthStatus.Degraded);

builder.Services.AddHealthChecksUI(opt =>
{
  opt.AddHealthCheckEndpoint("Health Checks Api", "/health");
})
.AddInMemoryStorage();

var app = builder.Build();

app.MapHealthChecks("/health", new HealthCheckOptions
{
  Predicate = _ => true,
  ResponseWriter = UIResponseWriter.WriteHealthCheckUIResponse
});

app.MapHealthChecksUI();
This setup effectively integrates health checks into your ASP.NET Core application and provides a user-friendly UI to monitor and analyze the health status of configured components. Adjust the configurations and endpoints as needed based on your specific application requirements and deployment environment.
Conclusion: What Have We Learned?
From this article, we’ve explored how ASP.NET Core Health Checks help us build resilient cloud applications. Resilience means ensuring our apps can handle failures and maintain performance.
ASP.NET Core Health Checks let us monitor app components like databases and APIs easily. This helps us catch problems early and keep our apps running smoothly.
HealthChecks.UI makes it simple to see health check results visually. It gives us tools to monitor and fix issues quickly, improving app reliability.
If you think your friends or network would find this article useful, please consider sharing it with them. Your support is greatly appreciated.
Thanks for reading!

