Exploring AI: Building a Simple .NET Console App with ChatGPT
Introduction to AI: Console ChatGPT Example
Artificial Intelligence (AI) mimics human behavior through machine learning, learning from its environment to perform tasks without specific instructions. Generative AI, a subset of AI, creates new content, often seen in chat applications like ChatGPT. These applications respond to natural language input with diverse outputs such as text, images, or code.
After my last article, I decided to create a simple .NET console application that utilizes OpenAI’s API. While there are various NuGet packages available to simplify the process, I opted to work directly with the API to gain a better understanding of its functionalities.
Now, let’s dive into the practical implementation of using OpenAI’s ChatGPT API in a .NET console application.
ChatGPT Console Demo: Setting Up Your API Key
Before we dive into the world of building a .NET console application powered by OpenAI’s ChatGPT API, there’s a crucial step we need to cover: obtaining your API key.
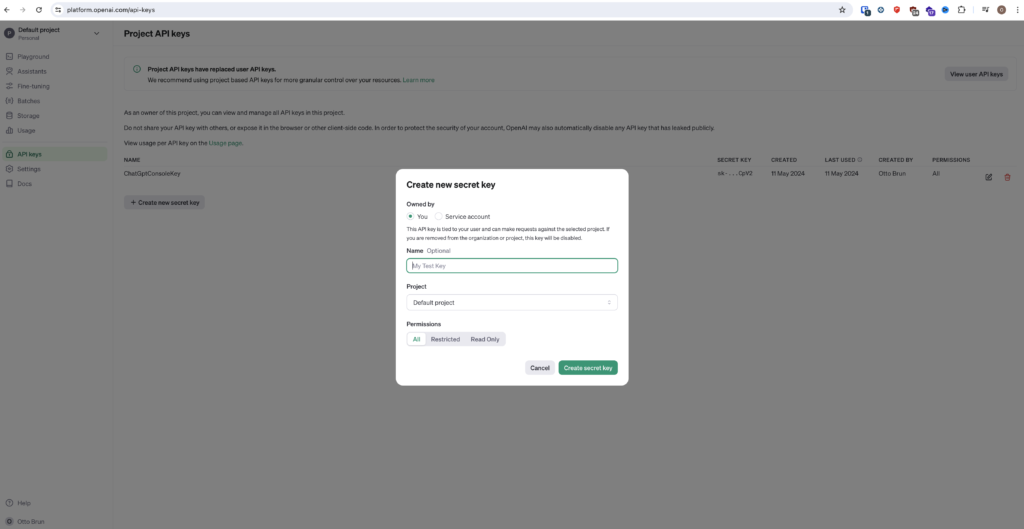
To get started, head over to the OpenAI platform’s API keys page. Here, you’ll need to sign up if you haven’t already and create your API key. It’s a straightforward process, but keep in mind that while OpenAI’s API remains free within certain usage limits, you’ll now need to add your credit card information to start using the API without encountering any errors.
Once you’ve registered and created your API key, make sure to save it in a safe place because it won’t be accessible later. This key will serve as the gateway for your .NET console application to communicate with the ChatGPT API seamlessly.
ChatGPT Console Demo
Before we proceed with our demonstration of the ChatGPT Console application, it’s essential to clarify that this example is primarily designed to showcase the functionalities of the ChatGPT API. It may not be optimized or written in the most efficient manner.
Now, let’s dive into the console app. This is a simple application that runs in the command-line interface of your computer. In this app, we’ll interact with OpenAI’s ChatGPT API to demonstrate how it works.
After setting up the necessary API key, the code establishes a connection to the OpenAI API using an HTTP client. It then enters a loop where it prompts the user to input text. If the user enters ‘exit,’ the loop breaks, terminating the program.
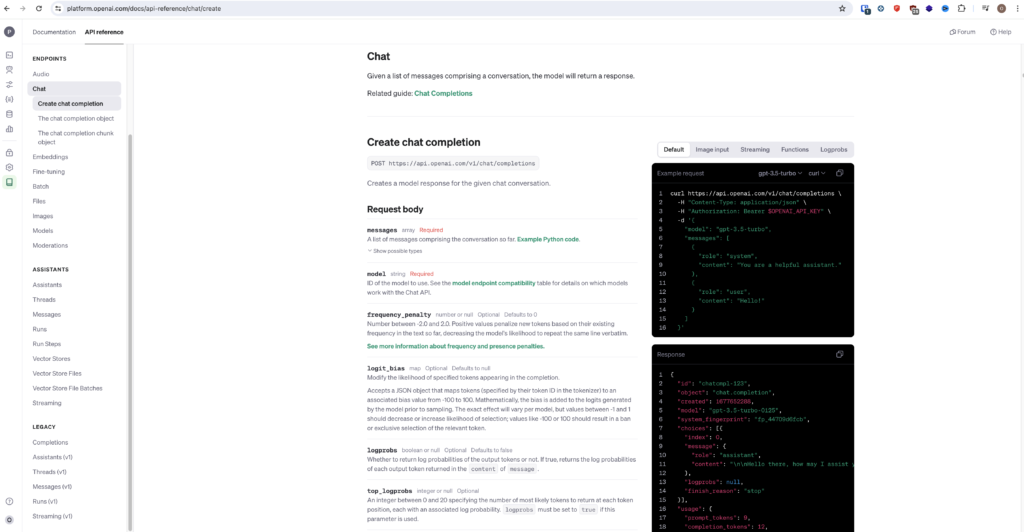
For each user input, the code constructs a JSON object containing the model type (‘gpt-3.5-turbo’) and the user’s message. It then sends this data to the OpenAI API endpoint using an HTTP POST request. Upon receiving a response, the code extracts the assistant’s message from the JSON response object and displays it to the user.
This simple yet powerful interaction demonstrates how easy it is to leverage OpenAI’s ChatGPT API to engage in AI-driven conversations within a .NET console application.
That’s essentially how the console app works. It’s a simple yet effective demonstration of how we can leverage the power of OpenAI’s ChatGPT API in a command-line environment.
var endpoint = "https://api.openai.com/v1/chat/completions";
var apiKey = "YOUR_API_KEY_HERE";

var httpClient = new HttpClient();
httpClient.DefaultRequestHeaders.Add("Authorization", $"Bearer {apiKey}");

while (true)
{
  Console.WriteLine("Enter the text you want to translate: ");
  var userMessage = Console.ReadLine();
  if (userMessage.Contains("exit"))
  {
    break;
  }

  var data = new
  {
    model="gpt-3.5-turbo",
    messages=new[]
    {
      new { role="system", content ="You are the best foreign language translator." },
      new { role="user", content = userMessage }
    }
  };

  var content = new StringContent(JsonConvert.SerializeObject(data), Encoding.UTF8, "application/json");
  var response = await httpClient.PostAsync(endpoint, content);
  var result = await response.Content.ReadAsStringAsync();
  var responseObject = JObject.Parse(result);
  var assistantMessage = responseObject["choices"][0]["message"]["content"].ToString();
  Console.WriteLine($"Assistant: {assistantMessage}");
};

The data variable is the most important, which contains the necessary information to send to the OpenAI API for generating responses. Let’s break it down:
model="gpt-3.5-turbo": Specifies the model to be used for generating responses. In this case, it’s set to “gpt-3.5-turbo,” which refers to a specific version of the GPT (Generative Pre-trained Transformer) model optimized for chat-based interactions.messages=new[] { ... }: Defines an array of messages to be included in the conversation. Each message is represented as an object with two properties:roleandcontent.new { role="system", content ="You are the best foreign language translator." }: Represents a message from the system or “assistant.” Here, it’s a fixed message stating “You are the best foreign language translator.” This message acts as the initial prompt or introduction from the AI.new { role="user", content = userMessage }: Represents a message from the user, whereuserMessageis the input provided by the user through the console. This message will vary based on what the user enters during the conversation.
In addition to these parameters, there are numerous other options that can be included in the request, offering a wide range of customization possibilities. OpenAI provides extensive documentation on their API, which can be found here. Developers can explore these resources to tailor their requests and fine-tune the behavior of the AI model according to their specific needs.
Simplifying Access to ChatGPT with Azure.AI.OpenAI
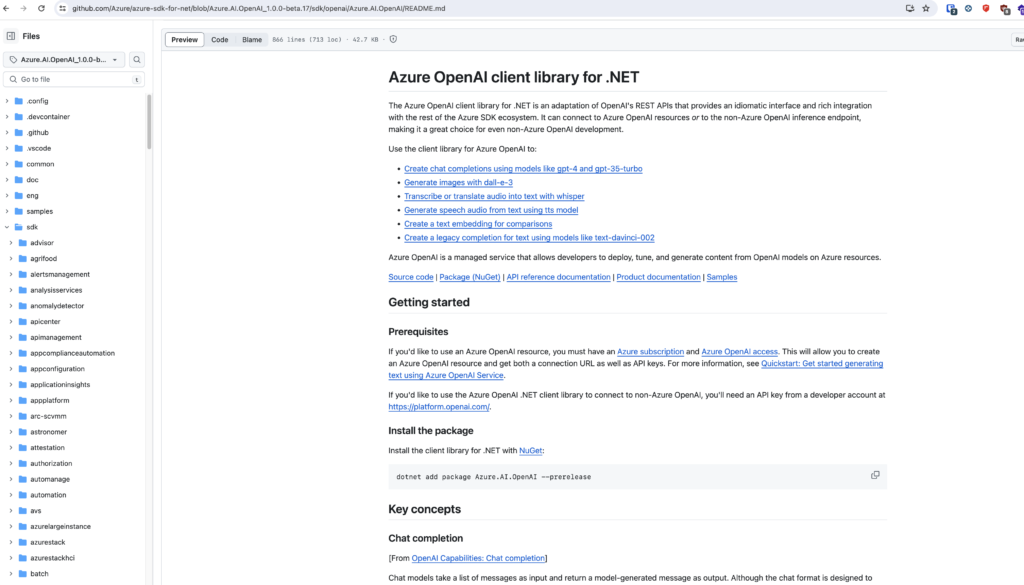
As a developer, leveraging existing tools and libraries can significantly streamline your workflow. For accessing ChatGPT or Azure OpenAI, there’s a more straightforward and powerful approach available: the Azure.AI.OpenAI NuGet package.
The Azure.AI.OpenAI client library for .NET serves as an adaptation of OpenAI’s REST APIs. It offers an idiomatic interface and seamless integration with the broader Azure SDK ecosystem. This library provides the flexibility to connect to both Azure OpenAI resources and non-Azure OpenAI inference endpoints, catering to a wide range of development scenarios.
By utilizing the Azure.AI.OpenAI package, developers can access the full capabilities of OpenAI’s services while benefiting from the robust features and integrations offered by the Azure platform. Whether you’re building applications within the Azure environment or working on non-Azure projects, this library offers a unified and efficient solution for interacting with OpenAI’s APIs.
To get started with the Azure.AI.OpenAI library, simply install the package from NuGet and follow the comprehensive documentation provided. With its intuitive interface and extensive functionality, incorporating OpenAI’s capabilities into your applications has never been easier.
Concluding Thoughts: Empowering Developers with Generative AI
Connecting to and using generative AI is incredibly easy. There are many NuGet packages available that make it simple to integrate AI capabilities into your applications. Additionally, there are numerous services offered by different providers that you can leverage.
Artificial intelligence is now accessible to every developer. With AI, developers can enhance their app’s features or provide entirely new services that were previously impossible. Of course, accessing these AI services comes with a cost, but the value they provide is worth it.
In conclusion, the power of AI is at your fingertips, and with the right tools and services, you can unlock endless possibilities for your applications.
If you think your friends or network would find this article useful, please consider sharing it with them. Your support is greatly appreciated.
Thanks for reading! 
 Discover CodeSwissKnife, your all-in-one, offline toolkit for developers!
Click to explore CodeSwissKnife 