Localization in ASP.NET Core: Make Your Minimal APIs Multilingual
Introduction
In today’s world of software development, where applications are built for global audiences, supporting multiple languages is no longer optional, it’s a necessity. Professional and production-grade applications must cater to diverse users, each preferring to interact with software in their own language. While developers often focus on making the front-end multilingual, it’s equally important to ensure that back-end APIs return responses that fit the user’s language preferences. This ensures a seamless experience across both the client and API layers of your application.
This is where localization in ASP.NET Core comes into play. Localization is the process of adapting your application to support different languages and cultural conventions. In .NET, this is made efficient and straightforward thanks to built-in tools and libraries that integrate seamlessly with your API logic.
In this article, we’ll explore how you can implement localization in ASP.NET Core Minimal APIs, enabling your services to dynamically serve culture-specific content. Whether it’s returning error messages or localized data, ASP.NET Core makes it easy to deliver responses tailored to your users’ languages. Once we cover the concept of localization and how it works in .NET, we’ll dive into practical examples to help you get started.
By the end of this guide, you’ll have a clear understanding of how to make your Minimal APIs multilingual and ready to support users around the world. Let’s get started!
Understanding Key Terms in Localization
Before we dive deeper into implementing localization in ASP.NET Core Minimal APIs, it’s important to understand some terminologies that are commonly used when building apps that support multiple languages and regions. Below is a quick glossary:
- Globalization (G11N): This refers to the process of making an app extensible so that it can support multiple languages and regions. The term “G11N” comes from the first and last letters, with the “11” representing the number of letters between them in “Globalization.”
- Localization (L10N): If globalization is preparing your app for multiple locales, localization is the act of customizing it for a specific language and region. For example, localizing text strings into French for users in France.
- Internationalization (I18N): This is a broader term that includes both globalization and localization. It represents the overall process of building applications to support users worldwide.
- Culture: A culture consists of a language and, optionally, a region. For example:
en-USrefers to English as used in the United States.fr-FRrefers to French as used in France.
- Neutral Culture: A culture that specifies a language but not a region. For example:
enspecifies the English language only, without associating it to a region like the United States or United Kingdom.
- Specific Culture: A culture that specifies both a language and a region. For example:
en-USspecifies English as used in the United States.en-GBspecifies English as used in the United Kingdom.
- Parent Culture: The neutral culture that a specific culture is based upon. For example:
- The parent culture of
en-US(American English) anden-GB(British English) isen.
- The parent culture of
- Locale: This term is often used interchangeably with culture in software development. It specifies both language and regional formatting.
Language and Country/Region Codes
When working with localization, it’s important to understand how culture codes are formatted. ASP.NET Core follows the RFC 4646 format for culture names:
<language code>-<country/region code>Examples:
es-CL: Spanish (Chile)en-US: English (United States)en-AU: English (Australia)
This format combines:
- Language Code: An ISO 639 two-letter lowercase code identifying the language.
- Example:
en(English),es(Spanish).
- Example:
- Country/Region Code: An ISO 3166 two-letter uppercase code identifying the country or region.
- Example:
US(United States),CL(Chile),AU(Australia).
- Example:
For more technical details and working with cultures, see System.Globalization.CultureInfo.
Using These Terms in Practice
As you build and globalize your applications, these terms come into play extensively. For example, in our minimal API example, we used localization (L10N) to make the API return text (names and descriptions) in different languages (English and French). At the same time, we relied on the concept of culture to determine whether en (English) or fr (French) resource strings should be served to the user.
Example: Localization in ASP.NET Core Minimal APIs
Disclaimer: This example is intended for educational purposes only. While it demonstrates key concepts, there are more efficient ways to write and optimize this code in real-world applications. Consider this a starting point for learning, and always aim to follow best practices and refine your implementation.
Prerequisites
Before starting, make sure you have the following installed:
- .NET SDK: Download and install the .NET SDK if you haven’t already.
- Visual Studio Code (VSCode): Install Visual Studio Code for a lightweight code editor.
- C# Extension for VSCode: Install the C# extension for VSCode to enable C# support.
This example is intended for development and learning purposes only. While it demonstrates a simple JWT implementation in ASP.NET Core using dotnet user-jwts, you should use a production-ready token generation system (e.g., IdentityServer, Azure AD, or another identity provider) in real-world applications.
Step 1: Create a New Minimal API Project
dotnet new webapi -minimal -n ArticleLocalizationApi
cd ArticleLocalizationApi
The -minimal flag ensures the project uses Minimal API structure.
Step 2: Add the Microsoft.Extensions.Localization NuGet package:
dotnet add package Microsoft.Extensions.Localization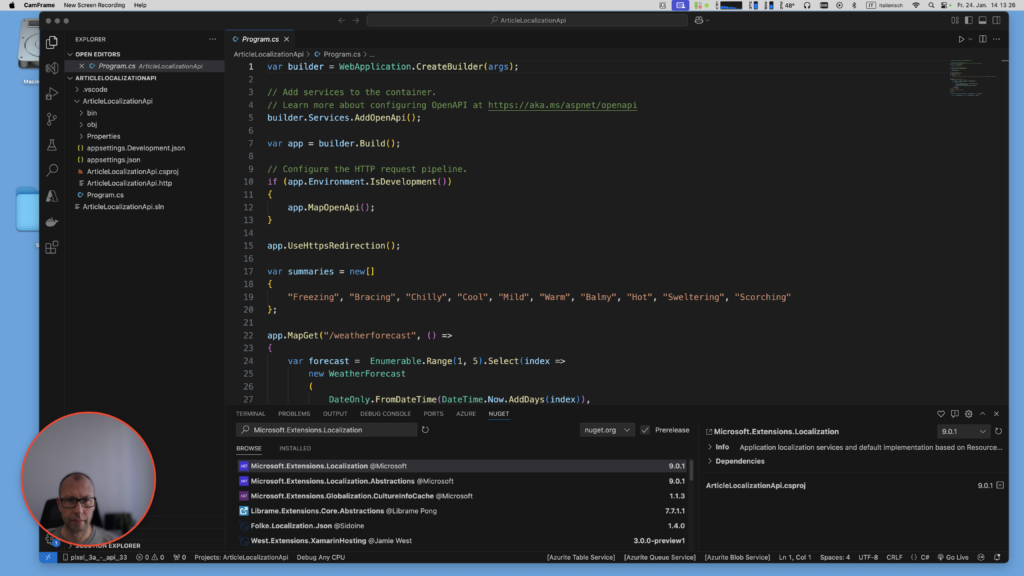
Step 3: Set Up Localization
Localization involves adding services and configuring the pipeline to handle resources for different languages. Let’s get started. In Visual Studio Code i am using ResX Editor as editor for resources files.
Add the Resources Folder
Create a Resources folder in your project and add two resource files for translations:
SharedResource.en.resxfor EnglishSharedResource.de.resxfor German
SharedResource.en.resx:
<data name="Article1_Name" xml:space="preserve">
    <value>Laptop</value>
    <comment/>
</data>
<data name="Article1_Description" xml:space="preserve">
    <value>A high-performance laptop perfect for work and gaming.</value>
    <comment/>
</data>
<data name="Article2_Name" xml:space="preserve">
    <value>Smartphone</value>
    <comment/>
</data>
<data name="Article2_Description" xml:space="preserve">
    <value>A feature-packed smartphone with a stunning display.</value>
    <comment/>
</data>
SharedResource.de.resx:
<data name="Article1_Name" xml:space="preserve">
    <value>Laptop</value>
    <comment/>
</data>
<data name="Article1_Description" xml:space="preserve">
    <value>Ein leistungsstarker Laptop, der sich perfekt für die Arbeit und das Spielen eignet.</value>
    <comment/>
</data>
<data name="Article2_Name" xml:space="preserve">
    <value>Smartphone</value>
    <comment/>
</data>
<data name="Article2_Description" xml:space="preserve">
    <value>Ein funktionsreiches Smartphone mit einem atemberaubenden Display.</value>
    <comment/>
</data>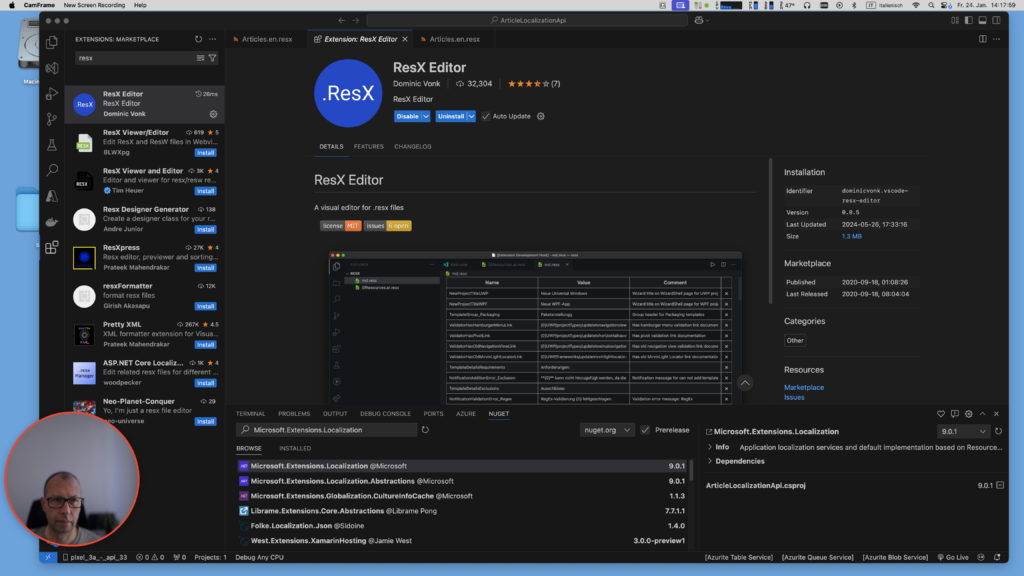
Add a Marker Class
This marker class indicates the resource group.
public class SharedResource {}Step 4: Create the Localization Service
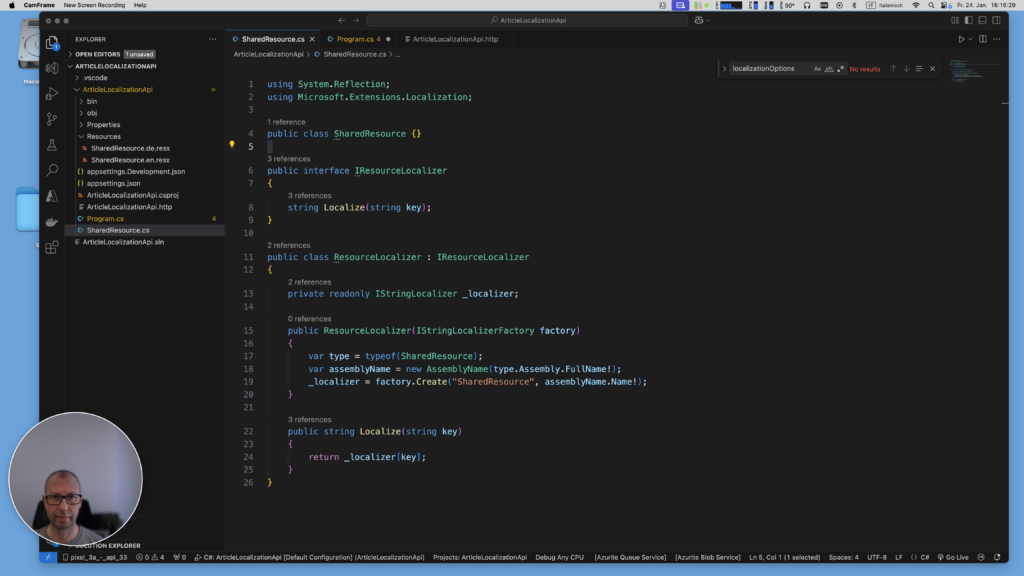
You’ll create a custom localization service that works with Minimal APIs. This service will fetch localized strings.
public interface IResourceLocalizer
{
    string Localize(string key);
}

public class ResourceLocalizer : IResourceLocalizer
{
    private readonly IStringLocalizer _localizer;

    public ResourceLocalizer(IStringLocalizerFactory factory)
    {
        var type = typeof(SharedResource);
        var assemblyName = new AssemblyName(type.Assembly.FullName!);
        _localizer = factory.Create("SharedResource", assemblyName.Name!);
    }

    public string Localize(string key)
    {
        return _localizer[key];
    }
}
Step 5: Add Services in Program.cs
Now, configure services and middleware in your Program.cs file.
Here’s how to modify the Program.cs:
// Add localization services
builder.Services.AddLocalization(options => options.ResourcesPath = "Resources");
builder.Services.AddScoped<IResourceLocalizer, ResourceLocalizer>();

// Define supported cultures
var supportedCultures = new[]
{
    new CultureInfo("en"),
    new CultureInfo("de")
};

builder.Services.Configure<RequestLocalizationOptions>(options =>
{
    options.DefaultRequestCulture = new RequestCulture("en");

    options.SupportedCultures = supportedCultures;
    options.SupportedUICultures = supportedCultures;

    options.RequestCultureProviders = new List<IRequestCultureProvider>
    {
        new AcceptLanguageHeaderRequestCultureProvider()
    };
});

var app = builder.Build();
app.UseRequestLocalization();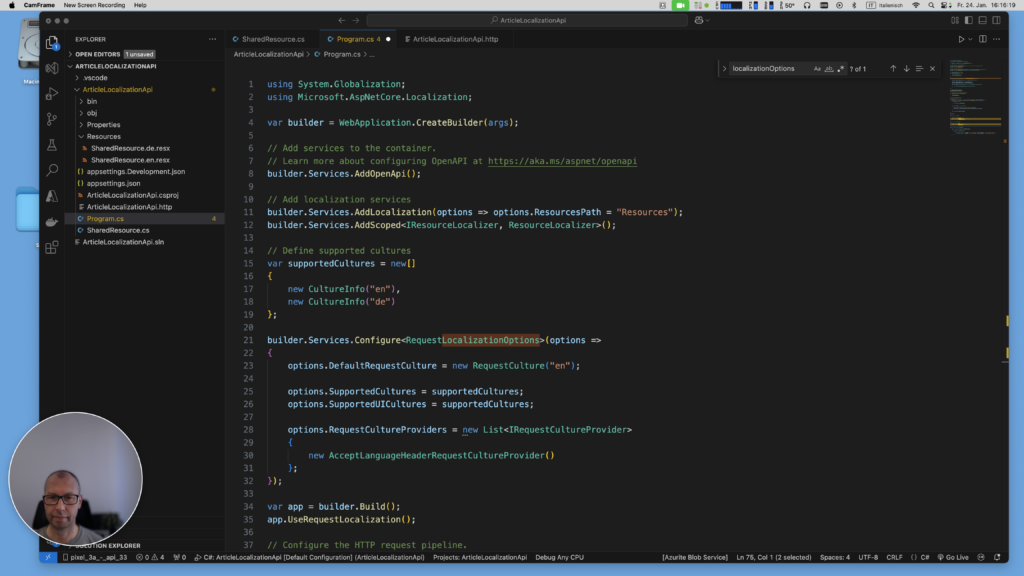
Step 6: Add Article Classes
Define classes for articles and the DTO that will be returned by the API.
public class Article
{
    public int Id { get; set; }
    public string NameKey { get; set; }
    public string DescriptionKey { get; set; }
}

public class ArticleDto
{
    public string Name { get; set; }
    public string Description { get; set; }
}
Step 7: Add Sample Data
Add a helper class with sample articles:
public static class DataHelper
{
    public static List<Article> GetArticles()
    {
        return new List<Article>
        {
            new Article { Id = 1, NameKey = "Article1_Name", DescriptionKey = "Article1_Description" },
            new Article { Id = 2, NameKey = "Article2_Name", DescriptionKey = "Article2_Description" },
        };
    }
}
Step 8: Add the Minimal API Endpoint
Now, configure the endpoint to fetch localized data. Add this to Program.cs:
app.MapGet("/articles/{id}", (int id, IResourceLocalizer resourceLocalizer) => {
    var article = DataHelper.GetArticles().FirstOrDefault(a => a.Id == id);
    if (article == null)
    {
        return Results.NotFound();
    }

    var articleDto = new ArticleDto
    {
        Name = resourceLocalizer.Localize(article.NameKey),
        Description = resourceLocalizer.Localize(article.DescriptionKey)
    };

    return Results.Ok(articleDto);
});
This is the full code for SharedResource.cs:
using System.Reflection;
using Microsoft.Extensions.Localization;

public class SharedResource {}

public interface IResourceLocalizer
{
    string Localize(string key);
}

public class ResourceLocalizer : IResourceLocalizer
{
    private readonly IStringLocalizer _localizer;

    public ResourceLocalizer(IStringLocalizerFactory factory)
    {
        var type = typeof(SharedResource);
        var assemblyName = new AssemblyName(type.Assembly.FullName!);
        _localizer = factory.Create("SharedResource", assemblyName.Name!);
    }

    public string Localize(string key)
    {
        return _localizer[key];
    }
}
This is the full code for Program.cs:
using System.Globalization;
using Microsoft.AspNetCore.Localization;

var builder = WebApplication.CreateBuilder(args);

// Add services to the container.
// Learn more about configuring OpenAPI at https://aka.ms/aspnet/openapi
builder.Services.AddOpenApi();

// Add localization services
builder.Services.AddLocalization(options => options.ResourcesPath = "Resources");
builder.Services.AddScoped<IResourceLocalizer, ResourceLocalizer>();

// Define supported cultures
var supportedCultures = new[]
{
    new CultureInfo("en"),
    new CultureInfo("de")
};

builder.Services.Configure<RequestLocalizationOptions>(options =>
{
    options.DefaultRequestCulture = new RequestCulture("en");

    options.SupportedCultures = supportedCultures;
    options.SupportedUICultures = supportedCultures;

    options.RequestCultureProviders = new List<IRequestCultureProvider>
    {
        new AcceptLanguageHeaderRequestCultureProvider()
    };
});

var app = builder.Build();
app.UseRequestLocalization();

// Configure the HTTP request pipeline.
if (app.Environment.IsDevelopment())
{
    app.MapOpenApi();
}

app.UseHttpsRedirection();

app.MapGet("/articles/{id}", (int id, IResourceLocalizer resourceLocalizer) => {
    var article = DataHelper.GetArticles().FirstOrDefault(a => a.Id == id);
    if (article == null)
    {
        return Results.NotFound();
    }

    var articleDto = new ArticleDto
    {
        Name = resourceLocalizer.Localize(article.NameKey),
        Description = resourceLocalizer.Localize(article.DescriptionKey)
    };

    return Results.Ok(articleDto);
});

app.Run();

public class Article
{
    public int Id { get; set; }
    public string NameKey { get; set; }
    public string DescriptionKey { get; set; }
}

public class ArticleDto
{
    public string Name { get; set; }
    public string Description { get; set; }
}

public static class DataHelper
{
    public static List<Article> GetArticles()
    {
        return new List<Article>
        {
            new Article { Id = 1, NameKey = "Article1_Name", DescriptionKey = "Article1_Description" },
            new Article { Id = 2, NameKey = "Article2_Name", DescriptionKey = "Article2_Description" },
        };
    }
}
Step 9: Test the API
Run the application:
dotnet runYou can test the endpoint using the file ArticleLocalizationApi.http, Postman, or cURL.
@ArticleLocalizationApi_HostAddress = http://localhost:5128

GET {{ArticleLocalizationApi_HostAddress}}/articles/1
Accept: application/json
Accept-Language: en
###

GET {{ArticleLocalizationApi_HostAddress}}/articles/2
Accept: application/json
Accept-Language: de
###
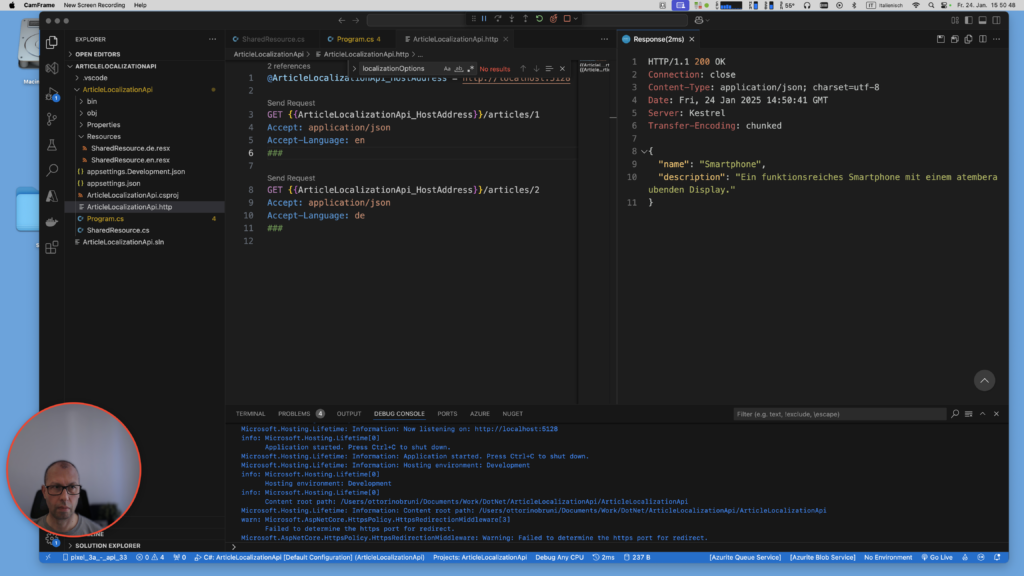
If no language (or an unsupported one) is specified, the API will fall back to English, as configured.
Conclusion
Implementing localization in an ASP.NET Core application is remarkably straightforward and effective, thanks to the powerful tools provided by the framework. With minimal configuration, developers can support multiple languages and cultures within their projects, while keeping the codebase clean and well-structured. Utilizing localized resources (.resx files), along with services like localization middleware and IStringLocalizer, allows for a clear separation between code logic and translation management, fostering a more maintainable project.
Localization is essential in modern applications, as we live in an increasingly globalized world where software is not limited to a single local market. Applications often need to be flexible and accessible to users worldwide. Supporting multiple languages not only enhances user experience (UX) but also broadens the product’s market appeal, strengthens inclusivity, and meets the expectations of a diverse audience.
If you think your friends or network would find this article useful, please consider sharing it with them. Your support is greatly appreciated.
Thanks for reading!
 Discover CodeSwissKnife, your all-in-one, offline toolkit for developers!
Click to explore CodeSwissKnife
