Save Money Developing Azure Storage Locally with Azurite Using VSCode and C#
Introduction
In my recent articles, I’ve talked extensively about Azure Functions. If you haven’t checked them out yet, I recommend starting with Getting Started with Azure Functions: C# and Visual Studio Code Tutorial. Last week, I published a post on Getting Started with Azure Blob Storage: A C# Project Using VSCode, where I guided you through the basics of working with Azure Blob Storage.
Today, however, I want to talk to you about another very important and powerful Azure tool: Azurite.
Developing and testing applications that interact with Azure Storage can be challenging when you’re working offline or want to avoid cloud costs. This is where Azurite comes into play. Azurite is an open-source cross-platform Azure Storage emulator that allows you to run Azure Storage locally on your development machine. By using Azurite, you can develop, test, and debug your applications with the same APIs provided by Azure Storage without needing an active internet connection or an Azure subscription. The latest Azurite V3 code supports Blob, Queue, and Table.
In this guide, we’ll walk you through setting up Azurite with Visual Studio Code and C#. You’ll learn how to configure Azurite, create a sample project, and interact with local Azure Storage resources just as you would with the actual Azure services. Whether you’re a senior developer or just getting started with Azure, this tutorial will help you streamline your development workflow and enhance your productivity.
Installing Azurite: Prerequisites and Steps
To get started with Azurite, you’ll need to install it on your development environment. Here’s what you need to do depending on whether you’re using Visual Studio or Visual Studio Code.
For Visual Studio Users
If you’re using Visual Studio 2022, Azurite is already included and updated automatically with each new version release. You don’t need to take any additional steps.
For Visual Studio Code Users
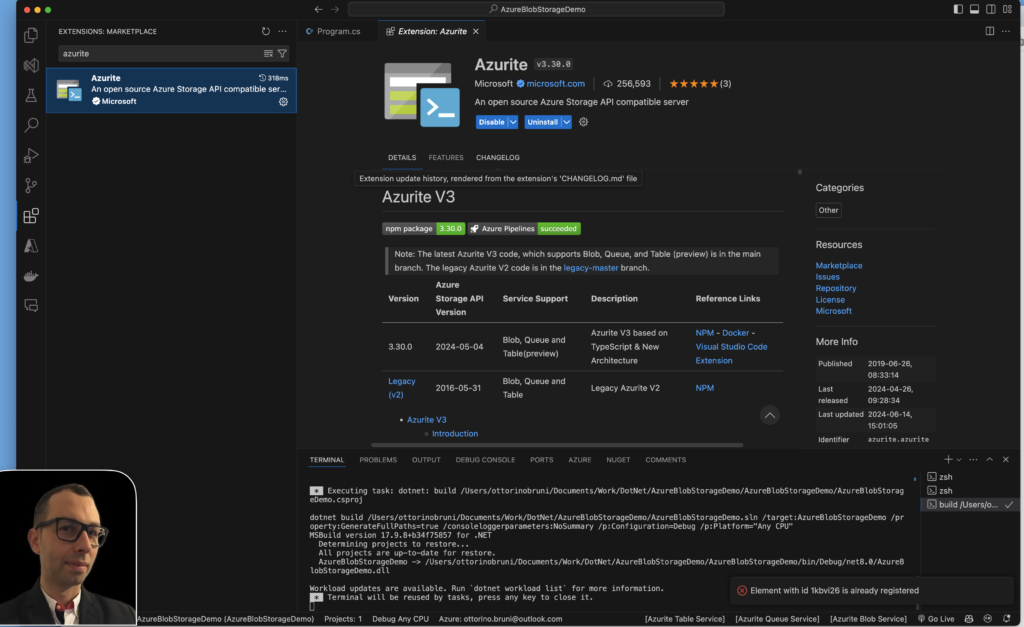
In Visual Studio Code, installing Azurite is straightforward through the extension marketplace. Follow these steps:
- Open Visual Studio Code.
- Select the Extensions icon from the Activity Bar on the side of the window.
- In the search bar, type “Azurite”.
- Find the Azurite extension in the list and click the Install button.
Once installed, you can easily start and manage Azurite directly within Visual Studio Code, making it convenient to develop and test your Azure Storage solutions locally.
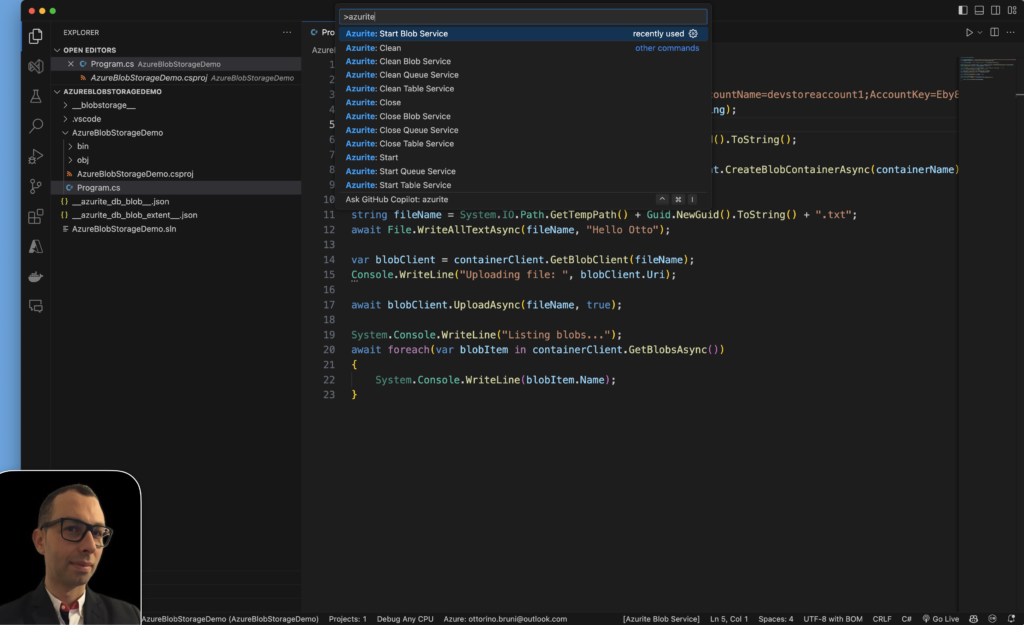
Visual Studio Code Commands
The Azurite extension supports the following commands:
- Azurite: Clean – Reset all Azurite services persistency data
- Azurite: Clean Blob Service – Clean blob service
- Azurite: Clean Queue Service – Clean queue service
- Azurite: Clean Table Service – Clean table service
- Azurite: Close – Close all Azurite services
- Azurite: Close Blob Service – Close blob service
- Azurite: Close Queue Service – Close queue service
- Azurite: Close Table Service – Close table service
- Azurite: Start – Start all Azurite services
- Azurite: Start Blob Service – Start blob service
- Azurite: Start Queue Service – Start queue service
- Azurite: Start Table Service – Start table service
Docker Installation
If you prefer Docker, you can easily set up Azurite using the following steps:
- Pull the Azurite Image from Docker Hub:Open your terminal or command prompt and execute the following command to pull the latest Azurite image from Docker Hub:
docker pull mcr.microsoft.com/azure-storage/azurite - Run the Azurite Docker Container:Once the image is pulled, run the Azurite Docker container with the following command:
docker run -p 10000:10000 mcr.microsoft.com/azure-storage/azuriteThe
-p 10000:10000parameter maps port 10000 on your host machine to port 10000 in the Docker container, allowing you to access Azurite’s Blob service locally.
Using Azurite with Docker
After starting the Docker container, you can use the same connection string and code examples provided earlier in this guide to interact with Azure Blob Storage locally.
By following these steps, you’ll have Azurite up and running in no time, allowing you to develop and test Azure Storage applications efficiently without incurring cloud costs.
After installing Azurite, you can easily manage it using Visual Studio Code commands. The Azurite extension provides several commands to control its services. Here’s how to run and manage Azurite in Visual Studio Code:
Using Azurite with Azure Blob Storage Example Project
In this section, we’ll walk through an example project that demonstrates how to use Azurite for local Azure Blob Storage development. We’ll reuse the code from the previous article on Azure Blob Storage, with a new connection string for Azurite and ensure the Azure.Storage.Blobs library is installed.
Prerequisites
- Ensure Azurite is installed as described in the previous sections.
- Install the
Azure.Storage.Blobslibrary if you haven’t already. You can do this via NuGet Package Manager:dotnet add package Azure.Storage.Blobs
Connection String
To connect to Azurite, you’ll need to use a specific connection string. The default connection string for Azurite can be found on the Azurite GitHub repository:
DefaultEndpointsProtocol=http;AccountName=devstoreaccount1;AccountKey=Eby8vdM02xNOcqFlqUwJPLlmEtlCDXJ1OUzFT50uSRZ6IFsuFq2UVErCz4I6tq/K1SZFPTOtr/KBHBeksoGMGw==;BlobEndpoint=http://127.0.0.1:10000/devstoreaccount1;QueueEndpoint=http://127.0.0.1:10001/devstoreaccount1;TableEndpoint=http://127.0.0.1:10002/devstoreaccount1;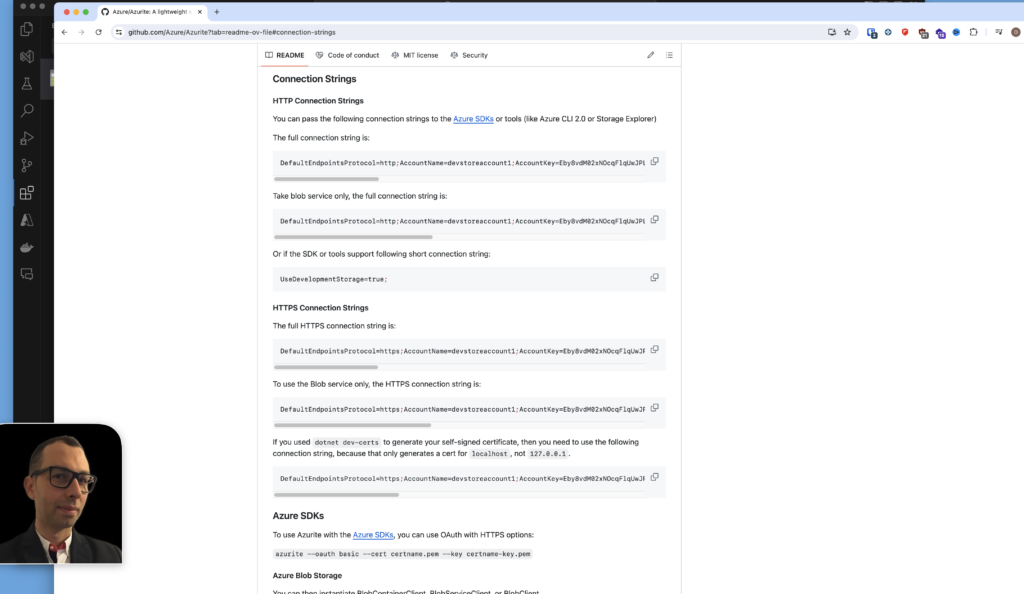
Example Code
Here’s an example of how to interact with Azure Blob Storage using Azurite.
using Azure.Storage.Blobs;

string connectionString = "DefaultEndpointsProtocol=http;AccountName=devstoreaccount1;AccountKey=Eby8vdM02xNOcqFlqUwJPLlmEtlCDXJ1OUzFT50uSRZ6IFsuFq2UVErCz4I6tq/K1SZFPTOtr/KBHBeksoGMGw==;BlobEndpoint=http://127.0.0.1:10000/devstoreaccount1;QueueEndpoint=http://127.0.0.1:10001/devstoreaccount1;TableEndpoint=http://127.0.0.1:10002/devstoreaccount1;";
var blobServiceClient = new BlobServiceClient(connectionString);

string containerName = "otto-storage-account" + Guid.NewGuid().ToString();

BlobContainerClient containerClient = await blobServiceClient.CreateBlobContainerAsync(containerName);
Console.WriteLine($"Container {containerName} created!");

string fileName = System.IO.Path.GetTempPath() + Guid.NewGuid().ToString() + ".txt";
await File.WriteAllTextAsync(fileName, "Hello Otto");

var blobClient = containerClient.GetBlobClient(fileName);
Console.WriteLine("Uploading file: ", blobClient.Uri);

await blobClient.UploadAsync(fileName, true);
System.Console.WriteLine("Listing blobs...");

await foreach(var blobItem in containerClient.GetBlobsAsync())
{
  System.Console.WriteLine(blobItem.Name);
}
Explanation
- Connection String: The connection string is configured to connect to Azurite running locally. This string includes the endpoints and keys needed to authenticate with Azurite.
- BlobServiceClient: This client is initialized with the connection string to interact with the Blob service.
- Creating a Container: A new blob container is created with a unique name.
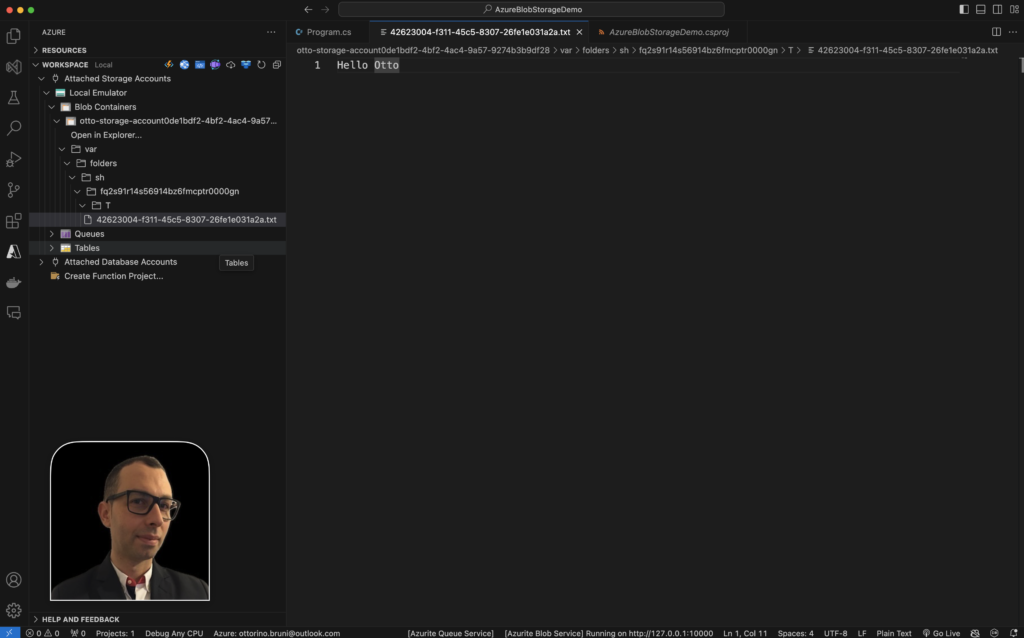
- Uploading a Blob: A temporary text file is created and uploaded to the new container.
- Listing Blobs: Finally, the blobs within the container are listed to verify the upload.
By following this example, you can leverage Azurite to develop and test your Azure Blob Storage applications locally, saving money on cloud costs during development.
Handling Connection Strings
For this demo, the connection string is included in the code for simplicity. However, for real applications, it’s highly recommended to use environment variables, secrets, or Azure Key Vault to manage the security of your application. You can find the connection string in the Azure portal by navigating to your storage account, then selecting Access keys.
Integrating Azurite into Your DevOps Pipeline
One of the great advantages of Azurite is its ability to be integrated into your DevOps pipeline. This allows you to run tests during your build process without needing an actual Azure Storage account. Here’s how you can set it up. You can find more information here.
Setting Up Azurite in Your DevOps Pipeline
Integrating Azurite into your DevOps pipeline is similar to running it locally. You just need to add a couple of tasks to your pipeline configuration.
- Install Azurite
- Run the Azurite Storage Emulator
By integrating Azurite into your DevOps pipeline, you can effectively simulate Azure Storage during automated builds and tests. This approach not only saves on cloud costs but also speeds up the development cycle by providing a consistent testing environment.
Conclusion
In this guide, we’ve explored how Azurite simplifies local development and testing of Azure Storage applications using Visual Studio Code and C#. Azurite serves as a powerful tool for developers looking to reduce dependencies on cloud resources during development stages. Here are the key takeaways:
- Ease of Use: Azurite seamlessly integrates into Visual Studio Code, allowing developers to manage Azure Storage services locally with ease. The straightforward setup process and intuitive commands streamline the development workflow.
- Offline Development: With Azurite, developers can work offline, eliminating the need for an active internet connection or Azure subscription. This capability ensures continuous productivity even in disconnected environments.
- Cost Savings: By leveraging Azurite for local development and testing, developers can significantly reduce cloud costs associated with Azure Storage usage. This is particularly beneficial during early stages of development and testing.
By following the steps outlined in this guide, you can quickly set up Azurite, create sample projects, and interact with Azure Blob Storage locally using familiar Azure APIs. Whether you’re a seasoned developer or new to Azure, Azurite empowers you to build and test Azure Storage solutions efficiently, fostering a more agile and cost-effective development process.
If you think your friends or network would find this article useful, please consider sharing it with them. Your support is greatly appreciated.
Thanks for reading!

 Discover CodeSwissKnife—your all-in-one, offline toolkit for developers!